Key Takeaways
- Catch mold in the act by following musty smells when the HVAC turns on, inspecting vents for stains or fuzzy spots, and recording any ailments that intensify indoors. Early action limits spread and saves indoor air quality.
- Verify and contain the issue prior to remediation by examining ducts, shutting down systems, quarantining impacted zones and employing HEPA filtration. Wear N95 masks, gloves and protective clothing to minimize exposure.
- Clean and sanitize thoroughly — detergent or approved mold removers, long-handled brushes and HEPA vacuums — then dry completely. Use antimicrobial and duct sealants to prevent moisture return.
- Know when to call the pros if growth is widespread, odors linger or symptoms worsen — especially for sensitive populations like asthmatics or immunocompromised people. Professional remediation guarantees complete removal and system integrity.
- Stop it from returning by keeping humidity under 60%, repairing leaks, insulating ducts and optimizing to HEPA filters with appropriate MERV ratings. Swap filters often and plan yearly HVAC checkups.
- Preserve your home’s value and performance — keep ducts clean to prevent increased energy consumption, structural damage and scaring away potential buyers. Record all cleaning, repairs and maintenance for a transparent record of health and safety.
How to remove mold from air ducts means locating moisture sources, checking vents and supply lines, and scrubbing with HVAC-specific EPA-registered disinfectants.
The majority require HEPA vacuuming, brush agitation, and coil and drain pan cleaning. Severe growth or porous duct liners typically require replacement.
To inhibit comeback, repair leaks, enhance drainage, and maintain indoor humidity BELOW 60%.
The next sections discuss signs of mold, safe cleaning steps, costs and when to call a pro.
Unmasking the Unseen Threat
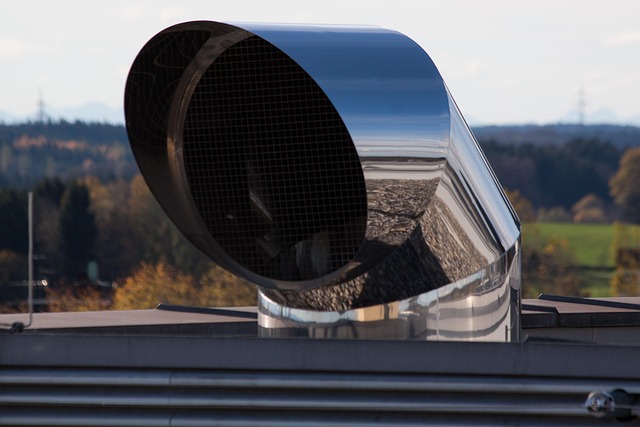
Mold in air ducts likes to lurk on shadowy, moist stretches of the HVAC trail, then fling spores about supply registers. Indoor air pollution injures health and hidden mold is a frequent culprit. High humidity over 70% or slow leaks allows spores to attach and thrive on dust and liner.
Maintain RH under 60% and so you dry-out, so you mold. Ventilation matters: most buildings move about 2–3 air changes per hour (ACH), and more ACH can dilute spores and odors.
Olfactory Clues
Musty or earthy odors upon system start up or ramp up typically indicate mold on coils, drip pans, or adjacent duct runs. If the smell flares with cooling cycles or post-rain spells, moisture is probably fueling it.
Match scent intensity room-to-room to map hot-spots. Heavy odor in a bedroom but not the hall can indicate a local branch duct with growth.
Brief, single event odor – like after cooking or cleaning – disappear quickly. Fresh, stale notes persisting for days or recurring every cycle typically indicate an active source.
Note date, time and room smells. Combine notes with weather, humidity and system mode (cool, heat, fan) to inform targeted inspection and cleaning.
Visual Indicators
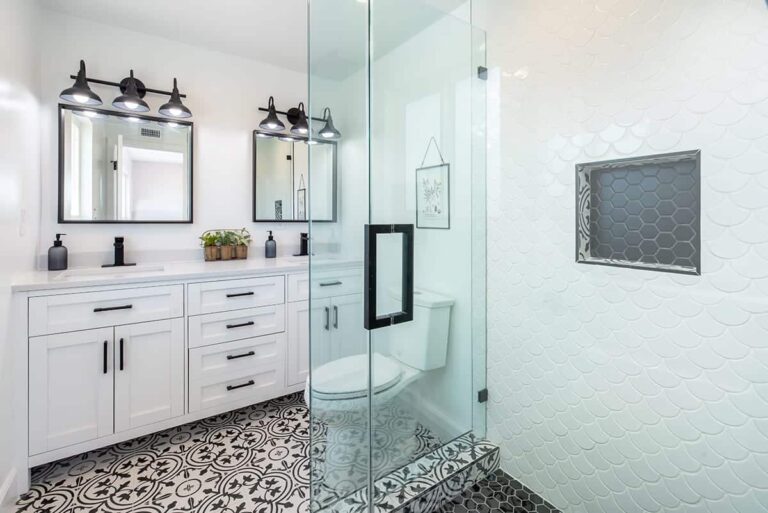
Inspect vent grilles and register faces for specks, smudges or fuzzy patches–commonly black, gray, green or white–as well as damp dust.
Watch for stains or halos on drywall or ceiling close to vents. Staining usually trails moisture, which fuels mold and indicates a bigger issue in the plenum or above the ceiling.
Beam a flashlight beyond the grille to inspect the boot and initial 12–24 inches of duct. Watch out for slimey films, unusual buildup or wet insulation.
In humid, stormy locations with aggressive closed cooling, these spots remain wet and promote development. Photograph findings with dates. Pictures assist in monitoring spread, informing scope and driving timely remediation before porous components become saturated.
Physical Symptoms
Keep tabs on sneezing, cough, itchy eyes or sinus stuffiness that intensifies indoors and abates when outside.
Wheezing, chest tightness or short breath at home can indicate dampness and mold exposure, associated with severe respiratory consequences.
Headaches, skin flare-ups or foggy focus can increase when the HVAC kicks in or during peak pollen seasons which increase indoor loads.
Maintain a symptom log and cross reference against runtime, humidity readings and ACH fluctuations to identify trends.
System Malfunctions
Diminished air, rattles, or quiet whistles can indicate debris or mold starting to block filters, coils, or duct bends, increasing strain.
Unexplained energy surges or weak cooling/heating indicate fouled coils and restricted ducts dragging down efficiency.
Short cycling or rooms that swing hot and cold point to busted ducts or plugged returns — frequently coupled with moisture problems that mold loves.
When performance dips coincide with smells, mold growth, or symptoms – schedule an inspection quick and fix humidity, leaks and ventilation to interrupt the cycle.
Why Your Ducts Are a Mold Haven

Moisture, dust, and still air create a perfect environment for mold growth in your ducts. When humidity levels are high, ventilation is inadequate, or water damage is ignored, extensive mold can quickly infest the system.
| Factor | What It Is | Why It Matters | Where It Shows Up | How It Drives Mold |
|---|---|---|---|---|
| Condensation | Warm, moist air hits cold metal | Water droplets form | Uninsulated runs, attics, basements | Sustained damp film feeds spores |
| Leaks | Gaps, cracks, failed seals | Moist air and water enter | Joints, boots, coil housings | Wet surfaces and hidden puddles |
| Poor Filtration | Low-grade or clogged filters | Dust and spores recirculate | Returns and near vents | Food supply for mold |
| Oversized Units | Short cooling cycles | Humidity not removed | Whole-home AC | Moist air lingers in ducts |
| Neglected Care | No checks or cleaning | Problems compound | All duct zones | Faster growth and spread |
| Insulation Gaps | Damaged or thin wrap | Temperature swings | Crawlspaces, roofs | More condensation events |
| Water Events | Spills, overflows, floods | Soaked ducts | Near drain pans, low runs | Colonies set in 24–48 hours |
Condensation Issues
Condensation is typical when cool supply air courses through metal ducts in warm, muggy rooms. This temperature differential causes water to bead on inner walls. Combine high indoor humidity—typically well over 60%—and the film never dries.
Insulate ductwork with unconditioned surfaces to increase surface temperature and prevent drops. Opt for closed-cell insulation with good vapor barriers and mastic-sealed seams.
Maintain air flow. Balanced vents, clean filters and clear returns reduce moisture load and assist the system in drying itself out. Look for damp areas, musty smells or rust stains. Water stains by registers or nearby ceilings are early hints.
System Leaks
Leaks suck humid air into the system and allow cooled air to leak out, all of which lowers surface temperatures and encourages condensation. Little cracks at joints, flex duct rips or squashed areas, accomplish the same thing.
Seal joints with mastic and UL-rated foil tape, patch cracks and damaged flex lines. Check coil cabinets, drain pans and condensate lines, for algae, standing water or corrosion. Make leak checks a regular part of service, especially following storms or any work in attics.
Oversized Units
Big AC’s cool quickly, but run short cycles, so pull less moisture. The air is cool but clings, remaining damp, leaving ducts clammy and extra vulnerable to mold.
Right-size the unit to the space with a proper load calc (i.e., Manual J). If replacement isn’t in the cards soon, switch to longer cycles—reduce fan speed where possible, and run a dedicated dehumidifier to maintain indoor RH around 40–55%.
Professional review minimizes mold risk and energy waste.
Poor Filtration
Coarse filters leave fine dust and mold spores undisturbed. That dust becomes food. Switch to high-efficiency pleated filters rated to trap spores, and change every 1–3 months, more frequently in dusty or busy homes.
Monitor filter status during peak seasons. If it appears to be gray or bowed, replace it. Select filters that indicate performance for bioaerosols, to enhance indoor air quality and reduce spore dissemination.
Forgotten ducts exacerbate all of this. In the event of flooding or overflows that reach ducts, dry within 24–48 hours. Others use vinegar or light detergents, with mixed results.
Bleach can assist on non-porous sections, but observe safety precautions. ALWAYS address the source–humidity, leaks or sizing mismatch–or mold is back. Bad indoor air or a leaky duct tends to lurk behind the issue.
The Full Spectrum of Health Risks
Mold in air ducts disperses mold spores through supply registers, exposing everyone inside. Dirty ducts are just one indoor particle source, but when mold grows in them, exposure can be persistent. Short and long-term effects differ individually and by health. Other populations, such as individuals with asthma, children, senior citizens, and immunocompromised individuals are at increased risk.
Timely remediation and moisture control at the source are to protect your entire household.
| Risk Type | Short-Term Effects | Long-Term Effects | High-Risk Groups | Why It Matters |
|---|---|---|---|---|
| Allergic | Sneezing, runny nose, itchy eyes, rashes | Chronic rhinitis, eczema flares | Children, elderly | HVAC cycles spread spores room to room |
| Respiratory | Cough, wheeze, chest tightness | Asthma worsening, sinusitis | Asthma, COPD | Symptoms spike with system use |
| Toxic (mycotoxins) | Headache, nausea, fatigue | Systemic illness concerns | Immunocompromised | Some species produce hazardous toxins |
| Neurological | Brain fog, poor focus | Memory and mood changes | Sensitive individuals | Exposure may impair daily function |
Allergic Reactions
Allergy symptoms usually present as sneezing, runny or congested nose, itchy eyes, sore throat and skin rashes. See if symptoms spike when the HVAC kicks on, when you’re in certain rooms, or in moist conditions.
Follow trends. If you’re sneezy and stuffy outside or away, ducts, or indoor sources, could be partly to blame. Children and seniors may respond more, as their airways are smaller or their immunity is not as strong.
Reduce exposure by cleaning ducts when mold is present, switching to pleated filters with a high MERV rating, and maintaining humidity below 60% RH. High MERV filters can increase indoor air quality by up to 30%.
Respiratory Distress
Breathing trouble, wheeze, chest tightness and a stubborn cough can all be signs of mold exposure. Asthmatics or chronic lung disease sufferers are at particular risk because spores inflame their already sensitive airways.
If cough and sinus congestion become better outdoors and return at home, examine ducts, coils, drain pans, and moist environments. Seek immediate treatment if symptoms tick upward with every HVAC cycle.
Dry out wet materials within 24–48 hours, or mold can come back.
Toxic Effects
Some molds — including some ‘black mold’ species — emit mycotoxins that can induce headaches, nausea, fatigue and malaise. Symptoms that are exacerbated in the building and improve when away indicate an indoor source.
Eliminate all the accessible growth and repair damp, or it will return. Swap filters every 30 days or less during remediation.
Neurological Impact
Extended exposure may cause brain fog, sluggish memory, sleep problems and lack of concentration. If it clears up when you leave the house or leave the HVAC off for a day, that’s a hint.
Children and sensitive people might react faster, impacting their school or work. Add cognitive changes to your risk review, even if other symptoms appear “minor.
Remember, duct cleaning data is still emerging — it’s not maintenance like coil and drain pan cleanings, filter swaps and annual checkups are. All the same, do something when you find mold, and maintain humidity 30–50% to avoid new growth.
How to Remove Mold from Air Ducts?
Mold in ducts damages air quality and thrives, spreading quickly — typically in 48 hours when moisture remains. Addressing mold problems involves inspection, containment, and thorough mold removal for minor, accessible issues. Extensive mold growth requires professional remediation.
1. Assess the Situation
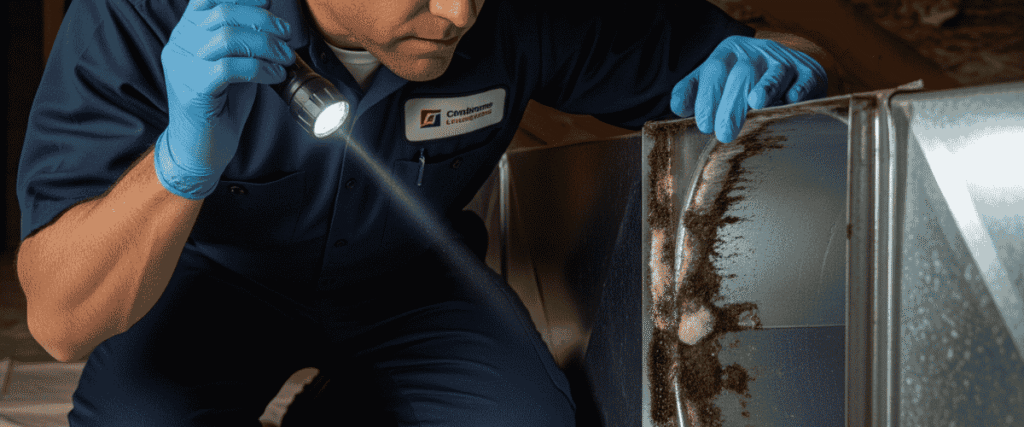
Begin with a methodical inspection. Take off vent covers and examine supply and return vents, trunk lines you have access to, the air handler, drain pan, and adjacent insulation. Check for black dots, furry spots, a damp smell and wet spots from condensation or leaks.
Sketch scope. DIY is appropriate for light, localized growth on accessible metal or plastic ducts. If mold goes deep into the system or covers big areas or porous insulation, call in a pro.
Verify duct material. Sheet metal can stand scrubbing and wet cleaning, fiberboard and internal duct liner cannot. If porous liners are contaminated, schedule for removal and replacement.
Document your observations with photos, dimensions, and moisture sources. This steers your strategy and aids if you need expert assistance down the road.
2. Isolate the Area
First, shut off the HVAC at the thermostat and breaker to minimize spore spread. Shut doors and unused vents. Set up a work area with plastic and tape to cover openings and floors.
Put on an N95 or better, gloves, eye protection, and disposable coveralls. This minimizes exposure and prevents spores from landing on clothing.
3. Employ HEPA Filtration
Lay portable HEPA air purifiers near the work area to snare any airborne spores. Run them while cleaning and for few hours after.
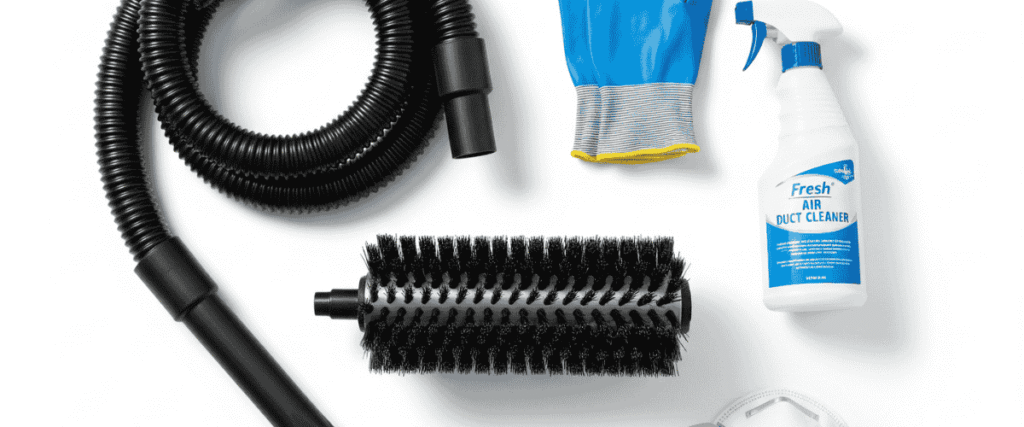
Vacuum vent covers, grills, and accessible duct surfaces with a HEPA-filtered vacuum fitted with a brush attachment to lift loose dust and mold prior to wet work. When finished, extract bags and filters, seal them, and double-bag in 6‑mil or thicker plastic to avoid leaks.
4. Clean the System
To tackle mold problems, mix a simple cleaner using 1 tablespoon of baking soda, 1/2 cup of detergent, and 1 cup of warm water. Spray this solution on affected areas with a spray bottle or damp cloth, allowing it to sit for 15–20 minutes before scrubbing with long-handled brushes. Afterward, wipe down the surfaces with microfiber rags to ensure thorough mold removal.
For effective mold remediation, coat the surfaces with either straight white vinegar (spray, wait up to 60 minutes, then rinse or dry) or a bleach solution consisting of 1 cup of bleach to 3.8 liters of water for non-porous surfaces. It’s crucial to never combine chemicals to avoid harmful reactions.
Finally, rinse cleaned metal surfaces with clean water and dry them thoroughly with towels and air flow. Any moisture left behind can lead to new mold growth, so dispose of all used cloths, brushes, and PPE from the mold zone by double-bagging them in 6-mil plastic.
5. Sanitize and Seal
Treat cleaned, non-porous duct surfaces with an HVAC-safe antimicrobial or mold inhibitor per label. Don’t use sealants on contaminated porous liners; replace instead.
Seal duct leaks at joints and seams with mastic or foil tape to restrict moisture intrusion. Replace or clean HVAC filters and wash vent covers prior to restart.
Follow up with a check in 2-4 weeks, and add regular inspections as early growth can come back quickly.
The Hidden Costs of Neglect
Neglecting mold infestation in air ducts not only adds to repair expenses but also poses serious health problems and contributes to energy loss. Dust, which nourishes mold growth, can significantly weigh down indoor air quality in every climate and season.

Structural Damage
Mold eats away metal ducts by rusting fasteners and seams, breaks down mastic seals and deteriorates fiberglass or foam insulation. In moist areas or around air handlers, spores infest liner surfaces, transforming insulation into a wet, mildewy sponge that fluffs back into spaces.
Water from backed up drains, leaky coils or cracked returns saturates framing and sheetrock adjacent to ducts, enticing decay and distortion around chases and ceilings. Lingering humidity + mold = mushy drywall, stained ceilings and delaminated subfloors around supply registers.
In time, saturated joists become weak and require bracing. Even small leaks in the plenum can wick into surrounding cavities, rendering any hidden repairs significantly more invasive. Early abatement prevents migration to walls, ceilings and floors.
Seal duct leaks — repair condensate lines — and dry wet insulation immediately. Pans, Ducts & More — Plan on inspections every 6–12 months on coil pans, blower housings, flexible duct runs and attic / crawl spaces. Discovering small growth now skips tear-out later and dodges those HVAC catastrophes that launch expensive maintenance spirals.
Energy Inefficiency
Mold and dust constrict flow, so fans run longer for the same setpoint. That additional runtime increases energy consumption and accelerates wear on motors and bearings. Higher monthly bills usually signal an issue.
Watch for surging kWh with stable weather and behaviors. Rooms that never quite get warm or feeble air from random vents indicate blockages or collapsed flex duct. Clean, dry ducts decrease static pressure and enable coils to exchange heat as engineered.
Switch out dirty filters, clear return areas of debris and control humidity to minimize regrowth. Spend a little on regular duct cleaning and coil maintenance. Most owners enjoy a 200%–300% lifetime ROI on regular care throughout the HVAC system from reduced repairs, longer equipment lifespans, and reduced energy expenses.
Property Devaluation
Visible mold, dirty registers and musty odors scare buyers and renters away. Bad indoor air quality is associated with asthma and sinus flare-ups. 8.4% of U.S. Children suffer from asthma, and 60% of allergy sufferers say their symptoms worsen in homes with dirty ducts.
The typical American spends approximately 90% of life indoors, so air quality goes from side note to value driver. Record inspections, lab tests if employed, and remediation measures with dates and receipts. Provide filter change logs, humidity readings — anything that builds trust and assuages post-offer jitters.
Make sure to address problems prior to listing to prevent scolding inspection comments. Maintain ducts clean, dry and odor free as preventative maintenance. Filthy air ducts sow dust that ruins indoor air and can close a deal or sale.
Neglect can lead to major repairs and stalled sales. Taking care of issues in their infancy safeguards your value and your health, and beats costly shocks.
Fortifying Your Home’s Defenses
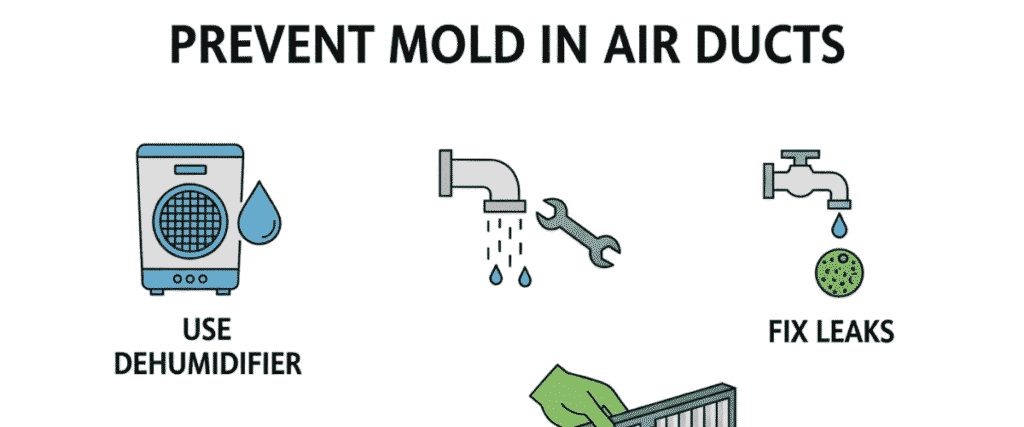
Prevent mold from returning by cutting off what it needs: moisture, warmth, and food. Focus on moisture control, consistent maintenance, and smart filtration to address potential mold growth, while supporting these actions with regular inspections and maintenance records.
Humidity Control
Try and maintain indoor humidity under 60%. Utilize a room-sized dehumidifier, particularly in basements, laundry rooms and bathrooms. In muggy seasons, operate it in tandem with the AC to extract additional moisture from the air and reduce the burden on your unit.
Monitor levels with digital hygrometers in areas that fluctuate with humidity, such as kitchens and around air handlers. Check every day during rainy weeks. If numbers jump, identify the source before mold takes hold.
Keep exhaust fans on while cooking and showering and for 10–15 minutes after. Always vent fans and dryers outdoors — not into attics or crawl spaces.
Repair leaks quickly. Dry wet carpet, drywall and insulation, within 24 hours. If a drip pan spills over or a supply line sweats, clean it up and fix the source. For small spots on grilles or near vents, wipe with baking soda, mild detergent and water or undiluted vinegar (let sit 60 minutes) or 3% hydrogen peroxide (let sit 10 minutes), then dry well.
Regular Maintenance
Build a simple checklist: filter changes every 1–3 months, coils and drain pan inspection each season, and duct checks every 6 months, professional clean every 3–5 years or after any water incident. Record dates and observations.
Look for early signs: black, green, or brown streaks on vents, fuzzy or slimy film on registers, a stale odor when the fan starts, or mold that returns after cleaning. Check evaporator coils, drain lines and pans – clear blockages and standing water that day.
Schedule one yearly HVAC tuneup to inspect airflow, refrigerant charge, blower cleanliness, and thermostat operation. If you’re in a humid climate or have allergies, consider adding air quality testing and a post-cleaning inspection after big jobs.
Upgraded Filtration
- Employ high-quality filters with a MERV 8–13 rating to trap fine dust and spores without choking air flow (check your system’s cap).
- Swap filters on time—every 1–3 months—and earlier in dusty areas, with pets, or post-renovation.
- Think about a deep-pleat media cabinet for additional surface area and less pressure-drops.
- Add UV-C lamps at the coil to restrict biofilm, or a duct-mounted UV/ionization purifier if your configuration and local codes permit.
Prompt Repairs
Repair leaks, condensation and cracked or crushed ducts immediately after you find them. Minor ceiling stains or rust on the air handler frequently indicate concealed moisture.
Seal joints with mastic, not duct tape, and insulate supply runs in unconditioned spaces to prevent sweating. Sub in new drain pans, sag-proof flex duct, strong blower belts or quality float switches so water stays out and airflow stays strong.
Maintain a record of all repairs, upgrades, filter changes and cleanings — this history helps identify trends and demonstrates due diligence during later inspections.
Conclusion
Mold in ducts stays invisible, but it spreads quickly and impacts air and health. Simple steps assist. Identify the origin. Repair leaks. Clean coils and pans. Switch out dirty filters. Apply EPA-registered cleaner. Then you need to dry the system. Keep humidity down, near 40–50%. Easy steps add up.
A couple of real successes make the whole thing. A tenant in a tiny flat eliminated musty in two days after sealing a duct gap and drying a wet pan. A family in a humid zone experienced less coughing following weekly filter inspections and a dehumidifier set at 45%. Little expenses. Real advances.
Next thing you need to do? So grab a hygrometer, check filters, and book a pro duct check if growth looks wide. Your lungs will thank you.
Ready to improve your indoor air quality? Whether it’s mold, dust, or routine maintenance, our experts have you covered. Contact us today to book your professional duct cleaning service.
Frequently Asked Questions
How can I tell if there’s mold in my air ducts?
Search for musty odors when the HVAC operates, spots near air vents, and constant allergies or headaches at home. Professional mold detection or air testing can confirm mold problems. Early detection prevents mold growth and safeguards indoor air quality.
Is it safe to clean mold in air ducts myself?
Small surface spots on grilles are not a problem, but deep mold inside ducts or on insulation can lead to serious mold problems. Cleaning mold incorrectly can spread spores and create respiratory issues. When in doubt, call a certified HVAC mold remediation expert.
What is the safest way to remove mold from air ducts?
Turn off the HVAC system and close the air vents. Utilize HEPA vacuuming and replace contaminated air filters and porous materials. Ensure it is dried out completely to prevent new mold growth; negative-pressure cleaning by a certified mold remediation expert should be employed to avoid cross-contamination.
Which disinfectants work best for duct mold?
Utilize EPA-registered fungicidal disinfectants designated for HVAC systems to combat mold growth. Avoid using bleach on porous materials, as it doesn’t soak in well and can rust metal. Ensure proper ventilation during use to maintain indoor air quality.
How do I prevent mold from returning in ducts?
Maintain humidity levels below 50% to prevent mold growth. Fix leaks promptly and change air filters regularly. Have your HVAC system serviced bi-annually, and consider duct cleaning to avoid condensation and ensure proper airflow.
Can mold in air ducts make you sick?
Yes, mold infestation can lead to coughing, wheezing, sore throat, headaches, and asthma attacks. Children, the elderly, and those with respiratory issues are particularly sensitive. Eliminating the source allows for rapid indoor air quality improvement.
How often should air ducts be inspected for mold?
Check every year, and after water leaks, remodeling, or if musty odors develop. Routine upkeep identifies moisture problems immediately, minimizing cleanup expenses and preventing potential mold growth, ensuring cleaner air.